Building Multi-Effect Pedals
Multis can be some of the most satisfying builds I do, also some of the most frustrating. They're a massive amount of work more than stand alone pedals. Most of which is done before even picking up a soldering iron. I thought I'd do this page to document the building of one of the more ambitious ones to give an idea of the process.
For me, one of the most important things with a multi, is that it must make sense. Not just in operation, but sonically also. I'm not keen on putting a load of effects together into a box that just save board space. I may do that occasionally, but they're not the most satisfying. The ones I enjoy the most are the ones that set out to create certain sounds and effects, or to serve a specific purpose. The effects must work together.
The Space Ritual is a perfect example, it's there to make stoner/psychedelic goodness and it's a one stop shop for doing that. The Lament Configuration is every flavour of fuzz I like (I count muffs as distortion really) in one box. The other one that I love was the first I ever made, and I think it's due a revisit.
It all started with this demo I found on YouTube:
I thought that was cool and needed to build something like that for myself. Alice was essentially my take on the YouTube effect made as a stomp box. Mine took away the DOD 404 added an LFO and delay.
Alice II
Phase one - Concept
Possibly the most crucial step is choosing effects that work well together. Having a massive stash of effects does make this easier for us as we can swap and change them to get all the ones that work best together for the sound we're wanting to achieve. So at this point you know what's going in there and in what order.
The next thing to consider are space constraints; will it fit in the box you're planning to use? Will all the knobs fit and lay out in a usable way? Usually in multis, the fewer controls and the simpler the better.
Finally, and this has caught us out a couple of times now, will all the effects play nicely together in the same enclosure and on common power? We've found multiple charge pumps to be the biggest pain to deal with as if you get a pair of similar ones in there they can start heterodyning.
As it stands with Alice II, instead of three effects, I'm planning to put five in here this time. Which chooses the 1550G enclosure for me. As I've gone for the big enclosure it also means I can use some effects with more controls on them (I've got a lot of pot space to play with), and it's allowed me a little more choice in that respect. One thing I did wrong with the previous 1550G was not space the stomps far enough apart. I'll address that with this one.
A lot of this build still hung on the Uglyface board, which is the key effect. I didn't want to use any vero in this build so getting an UF board that featured the LFO and all the mods was going to be an issue. Thankfully Rej and Forrest (CJ) came to the rescue and the Machette was born, the first PCB to bear the JSFX along with GCFX names on it. Cheers guys! All I did was verify the schematic and suggest a layout (that could go into a 1590B or sideways in a BB don'tcha know!) CJ did all the hard bits.
Phase two - Planning
At this point I have a fair idea what effects I'm going to use. It's not set in stone. Indeed, during this stage it became apparent I couldn't fit the Space Harp phaser in there as I originally planned. Pickdropper came to the rescue with a 1590A sized Phase 90 clone. Cheers Dave!
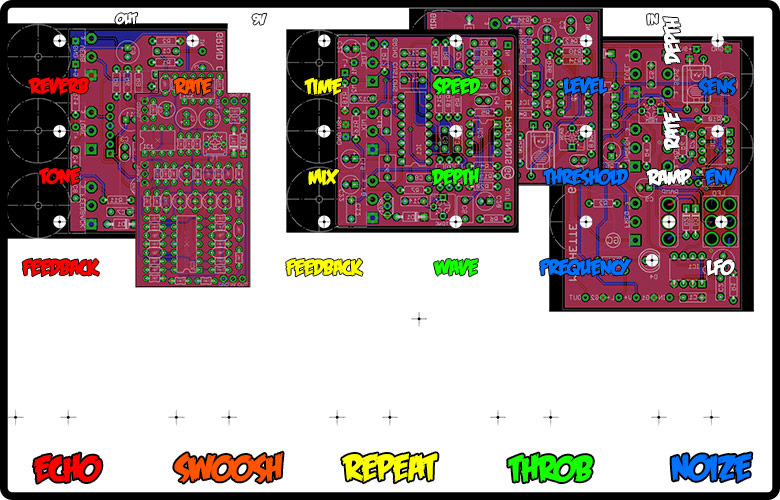
This is probably where most time is spent on a multi, essentially working with a template in Photoshop. All of this is to get the layout usable and to work out how it's all going to hang together inside.

Personally, where possible I want to board mount the pots. The stability of the boards hinges on this. Also the shorter the wires the better for everything. There's going to be a lot of stuff flying around in here. So I try to get scale PCB layouts into PS to get an idea where everything is going to go. All the time keeping in mind to keep the control layout understandable, uniform and as simple as possible. This doesn't necessarily mean sticking with the board's actual layout as I use solid core wire to space them off, but it does mean roughly conforming to it. Remember also that you've got a lot of depth to play with. Think in three dimensions like Kirk, not like Kahn in two.
Once I'm happy that it's going to work, it's on to ordering and building and this is where the pace picks up a little.
Phase three - Build
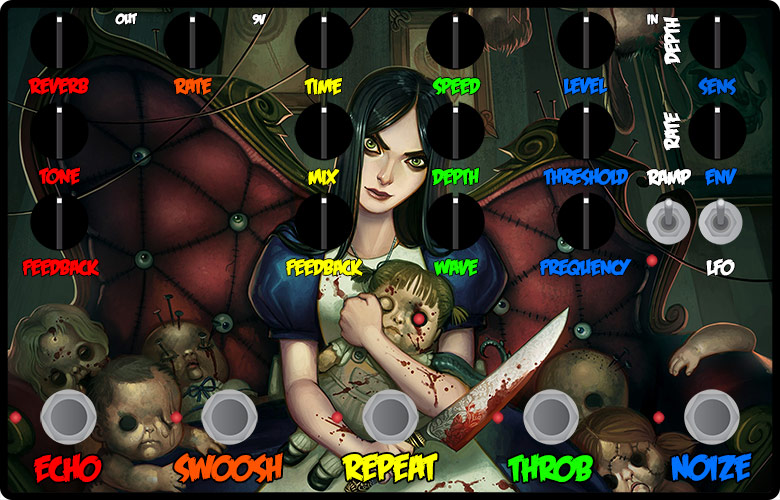
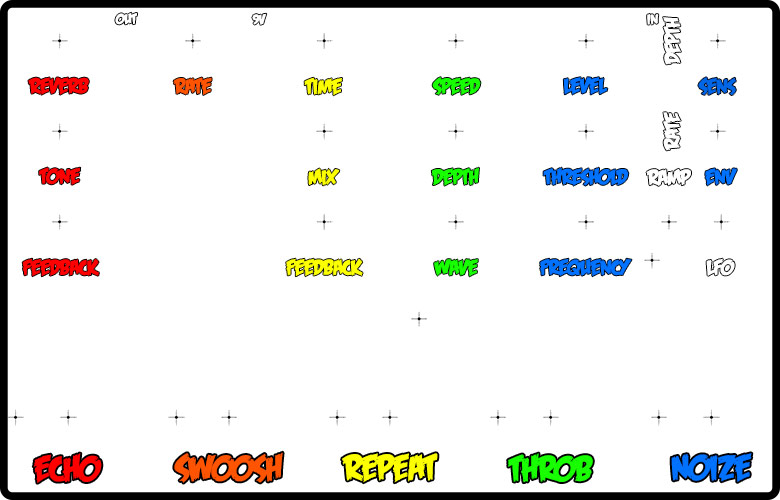
This is where we get into our fairly standard build routine. I produce a drilling template on paper (as below), tape it to the front of the enclosure, centre punch all the holes, pilot all the holes with a 3mm bit then take them out to their respective sizes with a stepper bit.
Once drilled in this case, the enclosure is sanded and polished, a decal is applied and Envirotex coated as per another tutorial on this site. Once cured, the Envirotex was drilled, then it's all cleaned up and it's time to start populating.
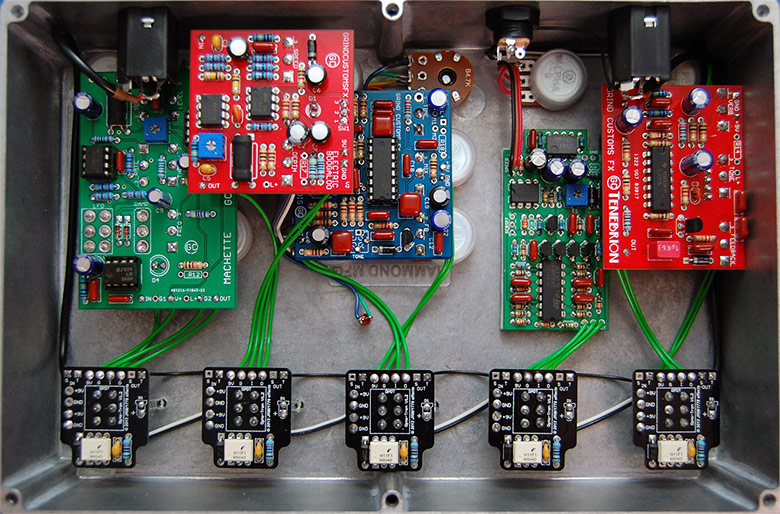
First things first, and I do this with nearly all builds, I get all the switching in there and test it. Doing this first greatly eases the rest of the process as once this is in, you can install and test each circuit in turn. It also helps you to be very tidy. There's over a metre of wire in that picture below, and an hour and a half work. Just for the switching and LEDs.
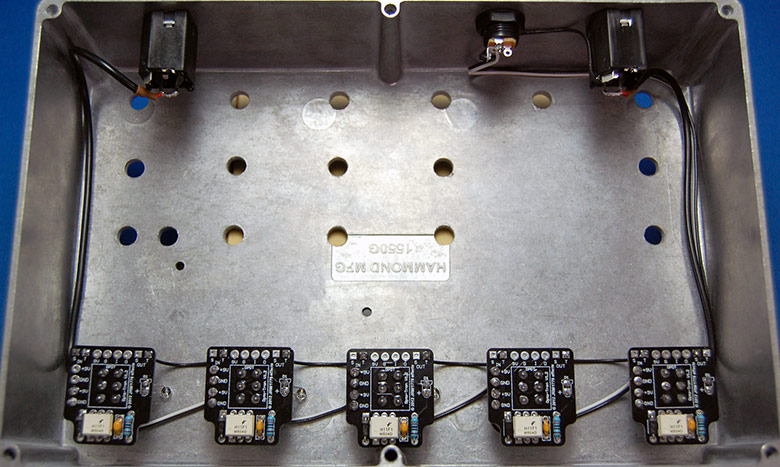
Because of all the preparation (populating all the boards and testing a couple of them before hand) and planning, dropping the effects in at this point isn't actually a big job. We know where everything is going to go, so it's just a case of being methodical, fitting one effect at a time and testing them as you go along. This actually was done in a single sitting, which even surprised me so I must be doing something right.
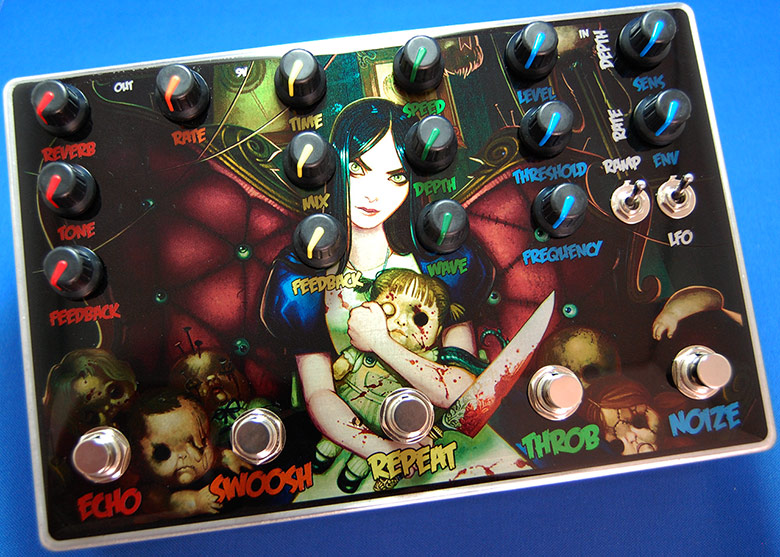
Here she is, the finished product. We use mixer knobs to colour code the effects to make it obvious what knobs belong to what. Try and keep things uniform an logical. You want it to be easy to use.
[ back ]